How to Know If Your Monitor Is VESA Compatible
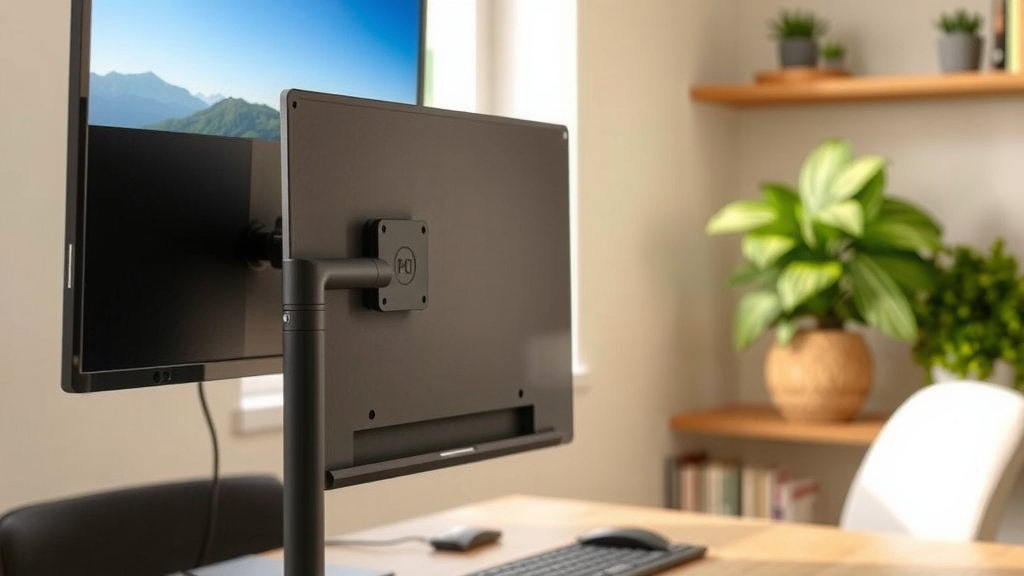
You can easily tell if your monitor is VESA compatible by checking the back for mounting holes. These holes form a square pattern, typically 75mm or 100mm on each side. If you see them, your monitor is almost certainly VESA mountable.
Knowing your monitor’s VESA compatibility is key if you want to use a monitor arm or wall mount. It ensures a secure and stable connection. This simple check can save you a lot of hassle when upgrading your desk setup or freeing up space.
- Look for a square pattern of mounting holes on the back of your monitor.
- Common VESA hole patterns are 75x75mm or 100x100mm.
- The monitor’s manual or manufacturer’s website can confirm compatibility.
- Some monitors might have holes but require an adapter for VESA mounts.
Let’s walk through exactly how to find those mounting holes and what to do next!
So, you’ve got a new monitor and you’re itching to get it onto an arm or a wall mount. That’s a fantastic idea! It can really transform your workspace, making it cleaner and more ergonomic. But before you buy that shiny new mount, you need to know one important thing: is your monitor built to hang out? We’re talking about VESA compatibility, and figuring it out is easier than you might think.
Checking Your Monitor’s VESA Mountability
Most modern monitors are VESA compatible. This means they have standardized mounting holes on the back. Think of it like a universal plug for monitor mounts. Finding these holes is your first and biggest clue.
Where to Look for Mounting Holes
The VESA mounting pattern is almost always located on the back of your monitor. You’ll typically find it in a square or rectangular arrangement of screw holes. If your monitor has a stand attached, you might need to remove it first. Most stands are designed to be easily detached, often with a single screw or a quick-release button. Once the stand is off, you should have a clear view of the mounting area.
What the Holes Should Look Like
These holes are not random. They are arranged in a perfect square pattern. The standard VESA sizes refer to the distance between the holes, measured in millimeters. The most common sizes are 75x75mm and 100x100mm. So, you’re looking for four holes forming a square, where each side of the square is either 75mm or 100mm. Some larger or professional monitors might use larger patterns like 200x100mm or 200x200mm, but 75mm and 100mm are the most common for desktop monitors.
What If You Don’t See Holes?
If you look at the back of your monitor and see absolutely no sign of screw holes arranged in a pattern, it’s likely not VESA compatible out of the box. Don’t despair just yet! Some manufacturers offer special adapters or plates for their specific monitors that can add VESA compatibility. You’ll need to check the manufacturer’s website or contact their support for this possibility.
Confirming VESA Standards and Sizes
Once you’ve spotted those tell-tale holes, you’ll want to confirm the exact VESA standard your monitor uses. This is important because mounts are designed for specific VESA patterns.
Consulting Your Monitor’s Manual
The absolute best source for confirming VESA compatibility is your monitor’s user manual. If you still have the physical manual that came with your monitor, flip to the specifications section. It will clearly state the VESA mounting pattern supported, if any. Many manuals also include diagrams, which can be super helpful.
Checking the Manufacturer’s Website
Lost your manual? No problem! The manufacturer’s website is your next best bet. Navigate to the support or product page for your specific monitor model. Look for a “Specifications” or “Tech Specs” section. You’ll usually find the VESA standard listed there. Search for your monitor’s exact model number – this is key!
What Do VESA Patterns Mean?
VESA, which stands for the Video Electronics Standards Association, created these mounting standards to simplify things for consumers. Knowing your VESA size ensures you buy a mount that will physically connect to your monitor. Here’s a quick look at common patterns:
| VESA Pattern (Width x Height in mm) | Common Use |
|---|---|
| 75x75mm | Smaller monitors (up to ~24 inches), some laptops |
| 100x100mm | Most standard desktop monitors (24-27 inches) |
| 200x100mm | Larger monitors, some smaller TVs |
| 200x200mm | Medium-sized TVs, larger monitors |
This table is a general guide. Always double-check your monitor’s specific specs.
What if My Monitor Isn’t Directly Compatible?
Sometimes, a monitor might have the physical space for VESA holes but requires a specific adapter. This is more common with certain curved monitors or all-in-one computers. These adapters usually screw into the monitor where the stand would normally attach, and then provide the standard VESA screw holes on the other side. You’ll need to buy the adapter specifically designed for your monitor model or brand.
A Quick Checklist for VESA Compatibility
To make sure you’ve got all your bases covered, here’s a handy checklist:
- Physically inspect the back of your monitor for square patterns of screw holes.
- Remove the monitor stand if it’s obstructing the mounting area.
- Note the size of the square pattern (measure if unsure, but check specs first!).
- Consult your monitor’s manual for the official VESA specification.
- Check the manufacturer’s website for your model’s technical specifications.
- Look for any mention of adapters if direct VESA holes aren’t obvious.
By following these steps, you’ll be able to confidently determine if your monitor is ready for a VESA mount. It’s a small step that makes a big difference in setting up your ideal workspace!
Conclusion
You’ve now learned the simple steps to check if your monitor is VESA compatible. Remember, it usually comes down to spotting those four screw holes in a square pattern on the back. If you see them, you’re likely good to go! Always double-check with your monitor’s manual or the manufacturer’s website to confirm the exact VESA size. This preparation is key to a smooth setup with your new monitor arm or wall mount. Your next step is to measure those holes or confirm the standard, then confidently select a mount that fits your monitor perfectly!
Frequently Asked Questions
What does VESA really mean for my monitor?
VESA refers to a standard set by the Video Electronics Standards Association. It defines the spacing of mounting holes on the back of monitors and TVs. This standardization ensures that mounts designed for a specific VESA pattern will fit your monitor’s mounting points.
How do I measure the VESA hole pattern if I can’t find the specs?
If you can’t find the VESA pattern in your manual or online, you can measure it yourself. Use a ruler or measuring tape to measure the distance between the center of the horizontal holes and the center of the vertical holes, in millimeters. You’re looking for a square pattern, so both measurements should be the same (e.g., 75mm or 100mm).
Can I still use a monitor arm if my monitor isn’t VESA compatible?
Sometimes, you can! Some monitors are not VESA compatible out of the box but can become so with a specific adapter plate designed for that monitor model. You’ll need to research if such an adapter exists for your particular monitor. Without an adapter or direct VESA holes, a standard monitor arm won’t attach securely.
Are all monitor stands removable?
Most monitor stands are designed to be removed to allow for VESA mounting. They usually attach with a few screws or a quick-release mechanism. If you’re unsure, consult your monitor’s manual; it will typically show you how to detach the stand.
My monitor has holes, but they don’t look like a perfect square. What does this mean?
While most VESA patterns are square (75x75mm, 100x100mm), some larger monitors or TVs use rectangular patterns like 200x100mm. Your monitor might have a non-square VESA pattern. Always confirm the exact width and height dimensions listed in your monitor’s specifications to ensure you buy a compatible mount.